Building an LED Matrix Clock From Spare Parts
I’ve been working remote for 20 years, but only recently started living in the same house with my dad, my sister, and three teenagers. With that many people it’s common for someone to come into my office and start asking me questions while I’m on a video call. This has happened enough that I wanted an “On Air” sign to indicate to anyone coming by my room that I’m not able to talk. A few months ago I decided to finally build one from spare parts around the house. I didn’t really need this of course, but I love playing with novel user interfaces.
The Product Vision
Since I didn’t have much time to spend on this project I used it as an opportunity to experiment with LLMs for embedded coding. Claude and Codex have been great for whipping up React prototypes in Typescript, but Circuit Python on embedded hardware is a very different challenge. While the syntax is easy (it’s just regular python with different libraries) the hard part has always been figuring out what hardware you have, finding the right drivers, and dealing with APIs that have changed over time. I’ll come back to how well it did, but first let’s get into the product design.
My vision for the device was pretty simple. I want a clock with an option to say On Air when I’m in a call. It needs to be big and bright enough for someone to see from across the room. While every good device should have a few buttons or even better a rotary encoder, anything more complex needs a display. I originally planned to have the setup on the device but I quickly learned that making even a simple menu with text is pretty much impossible on a 16x16 pixel display. Since this board has WiFi I figured it could run a web-server pretty easily, letting me push the complexity into a web app. This proved to be a wise choice. Not only can LLMs quickly spit out pretty HTML interfaces, it meant I could build a REST API that would be useful later for integrating with other tools.
Initial Prototype
For the hardware I began by digging for random components in my parts bin: a flexible 16×16 RGB matrix i bought some years ago on a whim and never did anything with, a random ESP32 based board I’d gotten from Adafruit, and some spare USB cables.
For the initial software I asked the LLM (I can’t remember it was Codex or Claude) to connect
to the board over a serial port and print hello world on the display. This didn’t
work because I had my pins wrong, but the LLM was able to walk me through debugging it. Once
we could reliably control the pixels progress was quite fast.
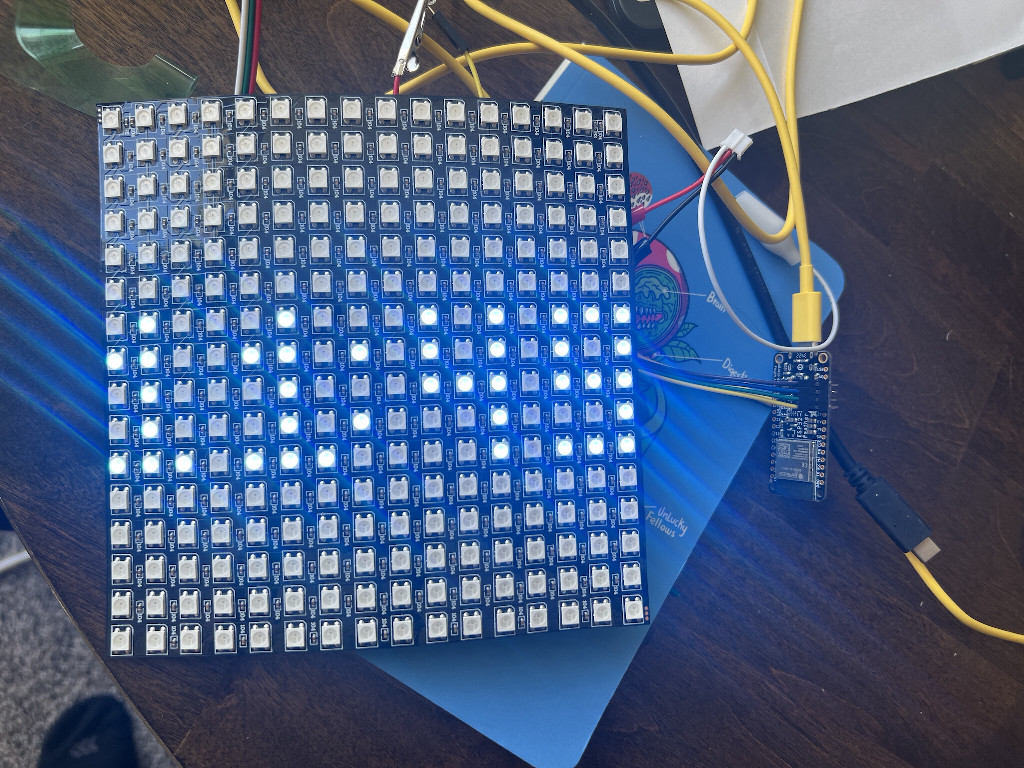
My vibe coding style is lots of short prompts with fast iteration. Together we quickly got a clock, timer, and scrolling Quiet Please text. That part was fast. Then I spent twice as long futzing with colors and animations until I had it how I wanted. The agent was able to generate placeholder images for graphics but tiny pixel art is not an LLM strong suit, so I later drew replacement PNGs by hand.
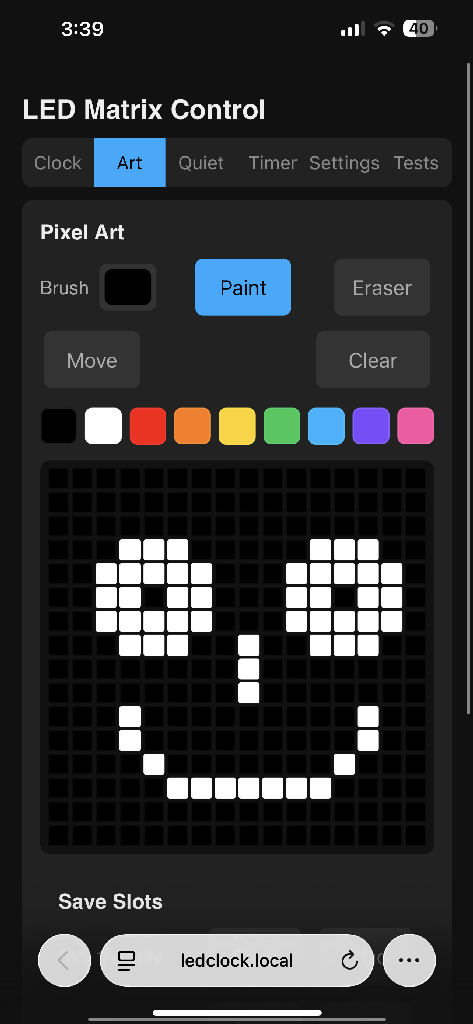
Once we got the web-server up and running I realized how powerful this development loop was. I could easily experiment with different ideas, many times faster than I could by hand. I could ask for a feature, let it spin for a few seconds, then reload the webpage on my phone. Most importantly, the latency of a REST call from the web app to seeing the screen change is essentially instant. I haven’t measured the exact latency (which would require using the high speed camera on the phone I was using for testing), but the lag was low enough that I could use a tiny live pixel editor to draw artwork on the actual device.
Making It Pretty
Once I had the basics working I focused on making it nicer; something a non-technical user would enjoy, without the wires and LEDs splayed everywhere. I experimented with sheets of paper as a diffuser, confirming that the text would be far more readable with something in front of the LEDs, even if it didn’t have full proper boxes for each pixel.
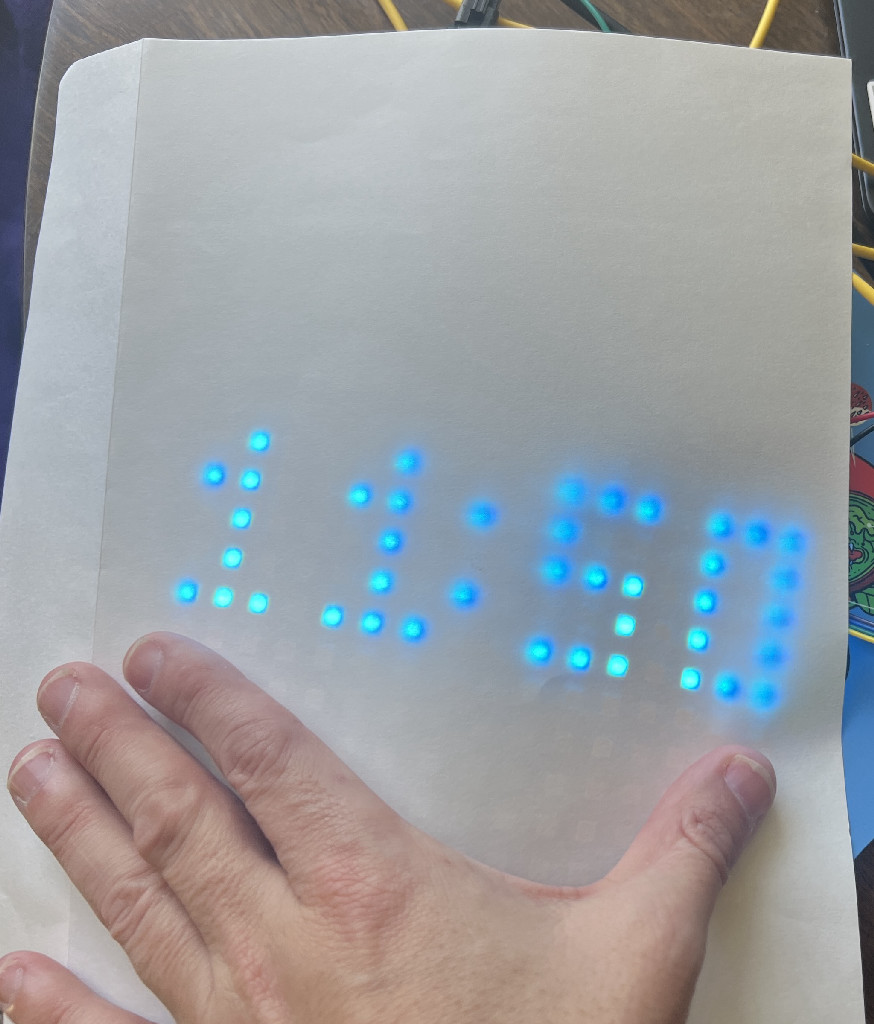
I started by 3d printing a stand with a curved groove to hold a sheet of paper as a diffuser and it worked well. Of course this early success meant I wouldn’t be happy with just a slip of paper. I needed the diffuser itself to be 3d printed. Mwaa haa haa.
To make a curved grid diffuser, I watched a few YouTube tutorials to learn how to make curved surfaces and printed a model plain white PLA. I polished up the web app and got MDNS working so anyone can load ledclock.local in their browser, and if they are on the local wifi it works, loading almost instantly.
After a few rounds of polish this is what I had.
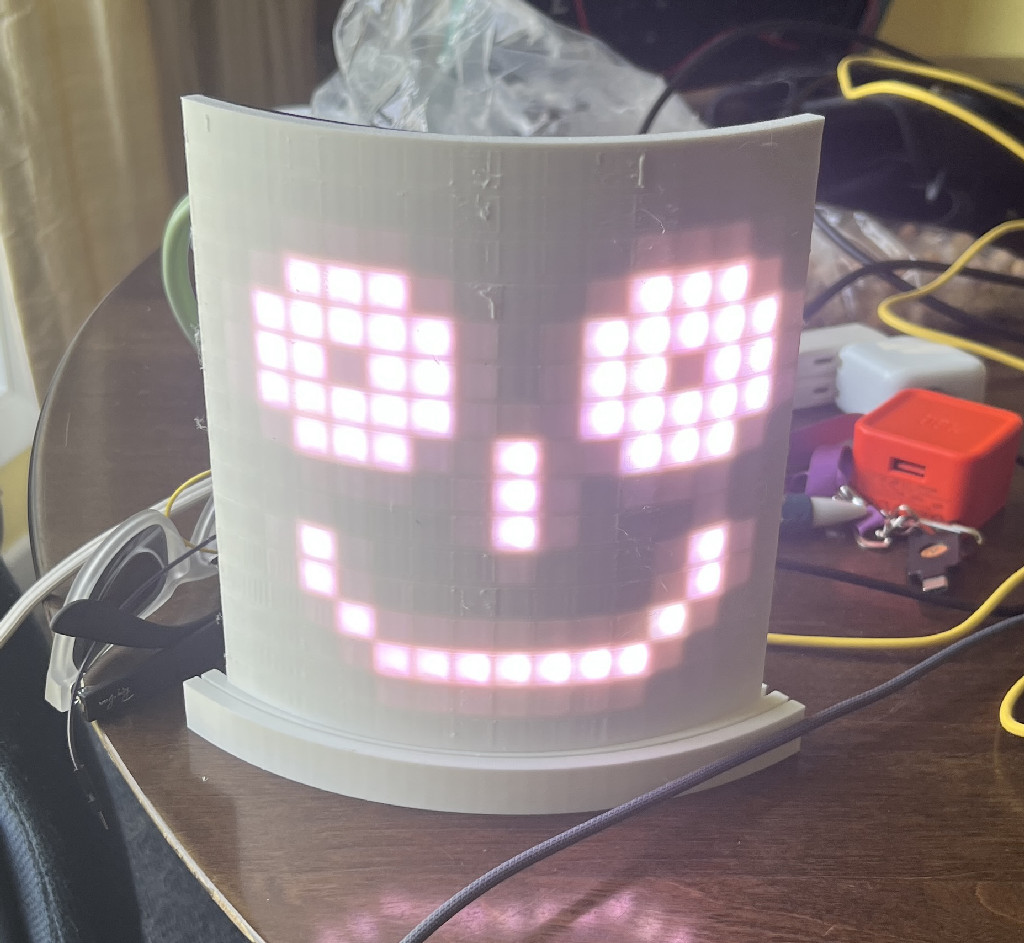
I’m really happy with how this turned out. Now let’s discuss what I learned.
Agentic Embedded Development
An agent can do well when it has the ability to validate its work. It can put code into the board and parse the serial output to see if the code does what it expected. This lets the agent quickly diagnose missing dependencies, bad pin assignments, and even find rendering bugs, though I have to be the agent’s eyes to report whether something worked visually. If the agent had a camera pointed at the led matrix it could probably run autonomously for quite a while. That’s something of like to try in the future. (Until it leads to the robot uprising).
Local Web Apps are powerful
I can’t stress enough how good the experience is of using a web app on the local network with MDNS. I can tell everyone in the house, even my nearly 80 year old father, to just type ledclock.local into their browser and then they are instantly connected. Low latency REST calls make it such a nice experience. I didn’t need to spend any time optimizing for network latency, and instead spent all of my energies on building an inituitive user interface.
The CircuitPython MDNS API is easy to use and can be configured by an INI file on the root filesystem of the device. Whenever I need to change any of the network settings I can edit the settings.toml file on my laptop in any text editor.
Next Steps
The biggest flaw right now is that it needs two power supplies. The LED matrix has a power source separate from the MCU. In the future I want to find a USB-C powered board that can also supply the higher current that the display needs. I also want to clean up the 3D printed enclosure with smoother edges and a single rotary encoder for quick interactions (pause timer, toggle quiet mode, etc).
Given how easy it is to create embedded hardware products with Circuit Python and agentic coding, why aren’t we seeing more small run devices that don’t lock us into cloud subscriptions. Maybe it’s time for some new Kickstarters.
As always, you can find the code in my github repo.